Quickstart
This topic walks you through JumpServer’s features quickly and efficiently, helping you try them out in 10 minutes or less.
Introduction
For more information about JumpServer, see Introduction.
Next, we will complete the following steps: prerequisites, creating an asset, authorizing the asset to the Administrator, connecting to the asset via the web as the Administrator, and auditing sessions and commands.
You can watch the video below or follow the steps to quickly get started.
Prerequisites
Before starting, please install JumpServer, and log in as an Administrator. For more information, see Installation.
Creating an asset
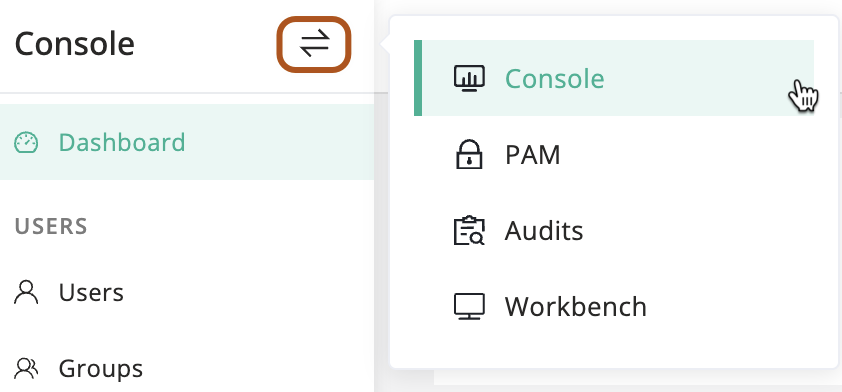
At the top-left of the page, select , then click Console.
Navigate to the Console > Assets > Host tab.
Click Create to open the platform selection page on the right.
Select the Linux platform and open the asset creation page.
In the Name field, type a name for the asset, such as "Demo Linux".
In the IP/Host field, type the IP address of the asset, such as "172.16.10.110".
In the Linux field, keep the "Linux" platform selected.
In the Nodes field, select the "/DEFAULT" node.
In the Accounts field, click the Add and follow the steps in the pop-up to complete the account creation.
In the Name field, type a name for the account, such as "root".
In the Username field, type the username for the account, such as "root".
In the Secret type field, select "Password".
In the Password field, type the password for the account.
For other fields, keep the default values.
click Confirm.
For other fields, keep the default values.
Click Submit.
Authorizing asset for admin
At the top-left of the page, select , then click Console.
Navigate to the Console > Authorization page.
Click Create to open the authorization creation form on the right-side page.
In the Name field, type a name for the authorization, such as "Authorize Demo Linux to Administrator".
In the Users field, select the "Administrator(admin)".
In the Assets field, select the "Demo Linux".
In the Accounts field, check only the box for "All existing accounts".
For other fields, keep the default values.
Click Submit.
Connecting to asset via web
In the right area of the top navigation bar, click .

At this point, the Web Terminal page should be open in a new browser tab.
In the authorization tree on the left side, search for and click the "Demo Linux" asset.
An asset connection pop-up will appear, select connection parameters and establish the connection.
Select the "SSH" tab, under the "Connect - Demo Linux".
In the Select account section, Select "root".
In the Connect method section, Select "Web > Web CLI".
Click CONNECT.
By this time, you should have successfully connected to the asset.
Next, you can try executing commands such as ls -al, whoami or pwd, etc.
Finally, run exit to end the current session.
Auditing connected sessions
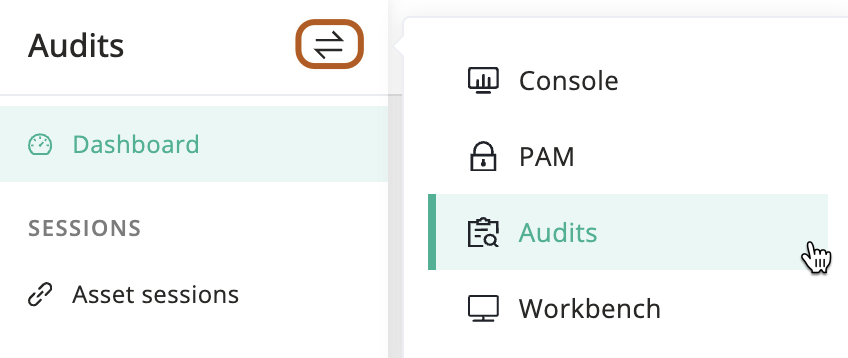
At the top-left of the page, select , then click Audits.
Navigate to the Audits > Asset sessions > Historical sessions tab.
You can view the history of asset connection sessions.
In the Actions column, click "Playback" to watch the recording online or "Download" to save it.
Auditing executed commands
At the top-left of the page, select , then click Audits.
Navigate to the Audits > Session commands page.
You can view all executed commands.
Click at the end of the row to view the command result.
Next steps
Now that you've completed the quickstart guide, it’s time to explore more advanced features of JumpServer!