Integrate LDAP authentication
About LDAP
Lightweight Directory Access Protocol (LDAP) is an open protocol used for accessing and managing distributed directory information. It is commonly used for centralized authentication and directory services, such as storing user accounts, permissions, and organizational structure information. LDAP is widely applied in enterprise identity management, single sign-on (SSO), and access control systems.
Distinguished Name (DN) is unique identifier for each entry in an LDAP directory, similar to a file path in a filesystem, such as "cn=admin,ou=Users,dc=example,dc=com".
Organizational Unit (OU) is used to organize and manage objects in an LDAP directory, similar to folders in a file system. For example, an organization may have multiple OUs "ou=HR" and "ou=IT", to distinguish users and resources of different departments.
How to configure

Navigate to System settings > Authentication > LDAP.
In the LDAP field, check to enable LDAP authentication.
In the Server field, type the LDAP server URI, such as "ldap://example.com:389" and "ldaps://example.com:636".
To configure LDAP TLS certificates, you can upload the files "ldap_ca.pem, ldap_cert.pem, ldap_cert.key" to the directory "/data/jumpserver/core/data/certs", then restart the service.
In the Bind DN field, type a user DN with at least query permissions, which will be used to query and filter users, such as "cn=admin,dc=example,dc=com".
In the Password field, type the password for the "Bind DN" user.
In the Search OU field, type the search OU to specify where to start searching for users, use | to separate multiple values, such as "ou=users,dc=example,dc=com | ou=tech,dc=example,dc=com".
In the Search filter field, type the filter expression to search for LDAP users. By default, the expression is "(cn=%(user)s)", where "%(user)s" is the placeholder syntax in Python. During filtering, it is replaced with *, resulting in "(cn=*)", which searches for all users. You can also replace "cn" with the actual username field, such as "uid" or "sAMAccountName".
In the User attribute field, type the user attribute mapping. The key represents the JumpServer user attribute name (available options: name, username, email, groups, phone, comment), while the value corresponds to the LDAP user attribute name.
{
  "name": "cn",
  "email": "mail",
  "username": "cn",
  "groups": "memberOf"
}In the Connect timeout (s) field, type the LDAP connection timeout in seconds.
In the Search paged size (piece) field, type the page size for searching users.
In the User DN cache timeout (s) field, type the cache duration for user DN in seconds to improve login authentication speed. Submit the form to clear the cache if the user DN is changed, otherwise, authentication will fail.
Click Submit.
Test LDAP connection
Navigate to System settings > Authentication > LDAP.
Scroll to the bottom of the page.
Click Test connection.
Test LDAP user login
Navigate to System settings > Authentication > LDAP.
Completed and tested LDAP configuration successfully.
Scroll to the bottom of the page.
Click Test login.
In the popup, type the username and password for LDAP user.
Click Confirm.
Import LDAP users
Navigate to System settings > Authentication > LDAP.
Completed and tested LDAP configuration successfully.
Scroll to the bottom of the page.
Click User import.
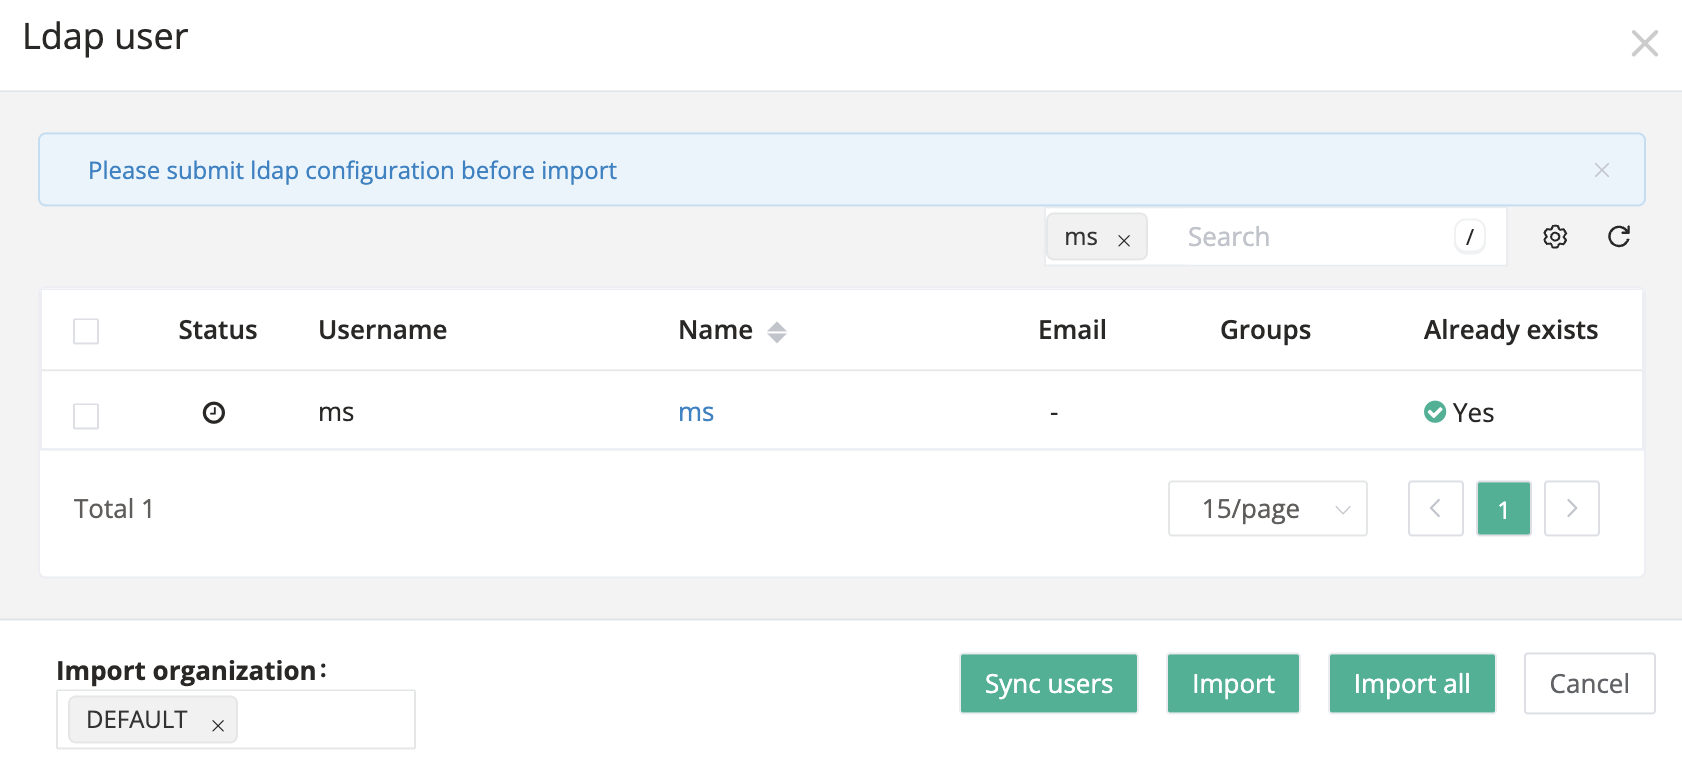
In the popup, you can import LDAP users in the following ways.
Click Sync Users to sync LDAP users to the table.
In the Import organization field, select one or more organizations to import.
Check the users you want to import, click Import to proceed.
Alternatively, you can click Import all to import all users.
Set up LDAP user sync
Navigate to System settings > Authentication > LDAP.
Completed and tested LDAP configuration successfully.
Scroll to the bottom of the page.
Click Sync settings.
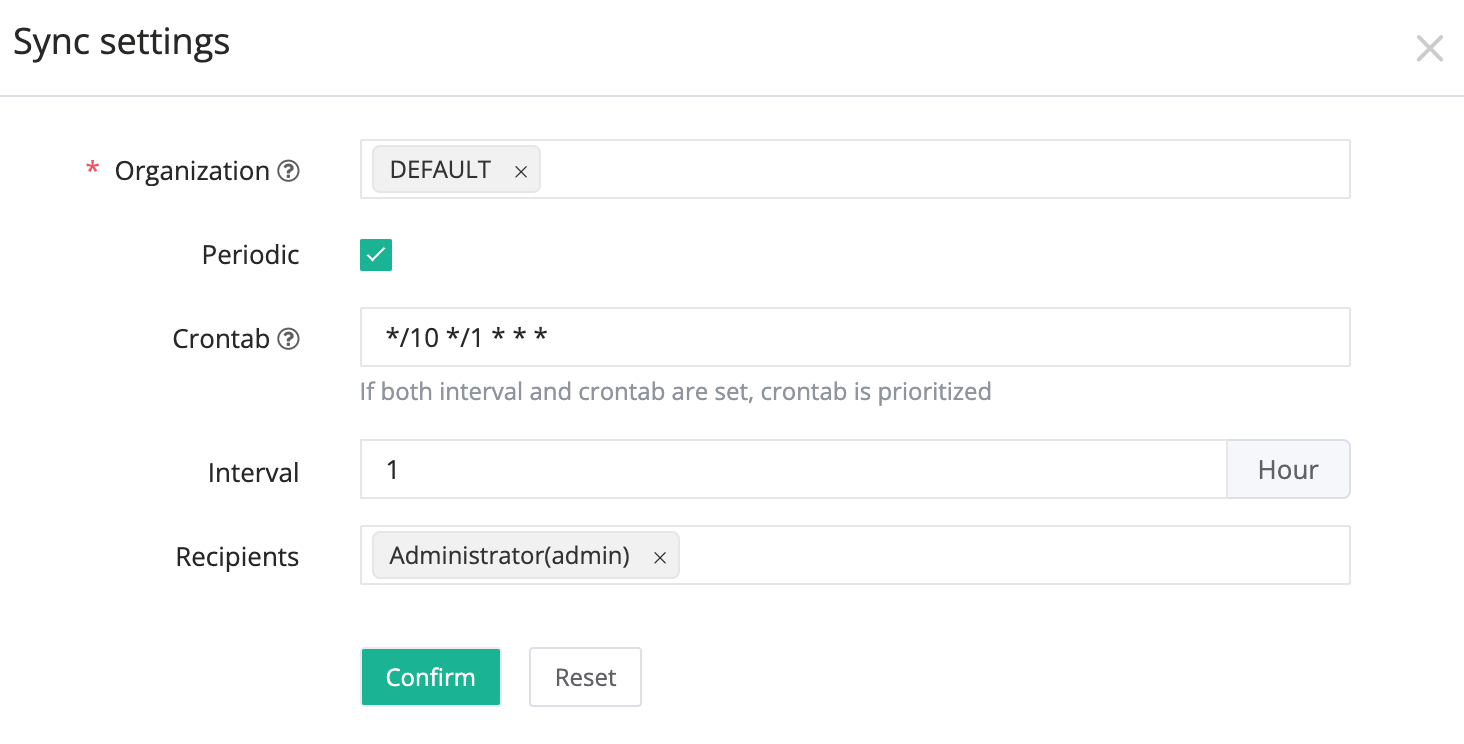
In the popup, type the following information to configure.
In the Organization field, Select one or more organizations to sync.
In the Periodic field, check to enable periodic sync.
In the Crontab field, type the crontab expression. If empty, "Interval" will be used.
In the Interval field, type the sync interval in hours.
However, if "Crontab" has a value, "Crontab" will take priority.
In the Recipients fields, select one or more users to receive the sync result.
Click Confirm.