Create users and groups
This topic describes how to create users and groups.
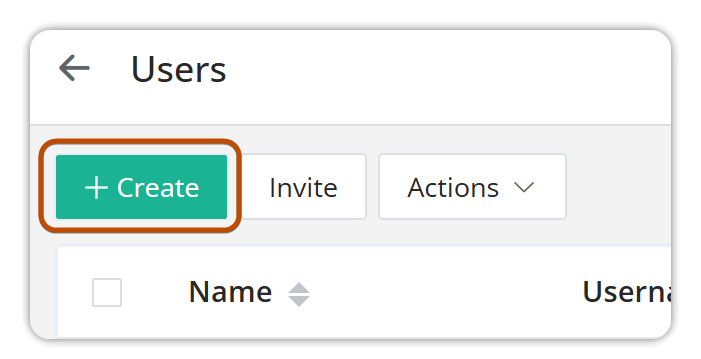
Create a user
- In JumpServer, navigate to Console > Users and click the + Create button.
-
In the Name field, enter the user name.
-
In the Username field, enter a unique username for logging into JumpServer.
-
In the Email field, enter the user email address to receive system messages. Make sure the email address is not shared by other users.
-
Optionally, in the group field, select user group. Grouping users simplifies permission management and batch assignments.
-
In the Password settings field, choose between Reset link will be generated and sent to the user and Set password.
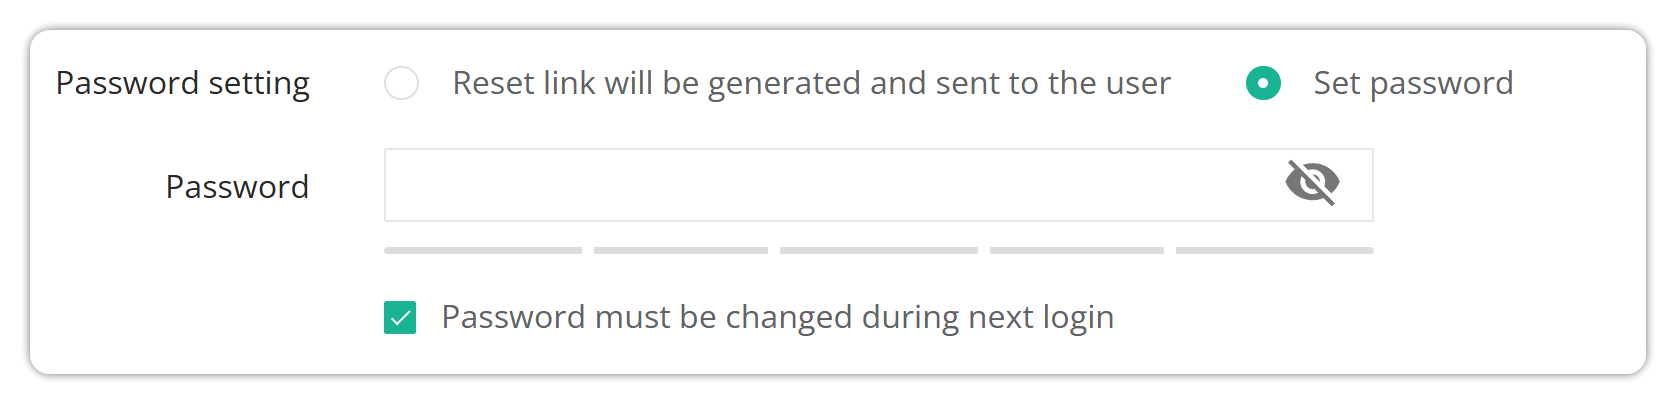
- Reset link will be generated and sent to the user: A password reset email will be sent to user, the user can set the password themselves. Ensure that the email server is configured in System Settings first.
- Set Password: Administrator can set the password for the the user.
-
In the MFA field, select Disabled, Enabled, or Force Enabled.
-
In the Source, specify the user source.
-
In the System Roles field, assign user system role to to define permissions (e.g., System Administrator, System Auditor, User).
-
In the Organizational Roles field, assign user Organizational role to define permissions under current organization (e.g., Org. Administrator, Org. Auditor, Org. User).
-
In the Active field, enable or disable the user.
-
In the Date expired field, set the user validation period.
-
Optionally, in the Phone field, enter the user mobile phone number.
-
Optionally, in the Description field, enter a description of the user.
-
Click Submit to create the user, or Save & Continue to create and add more.
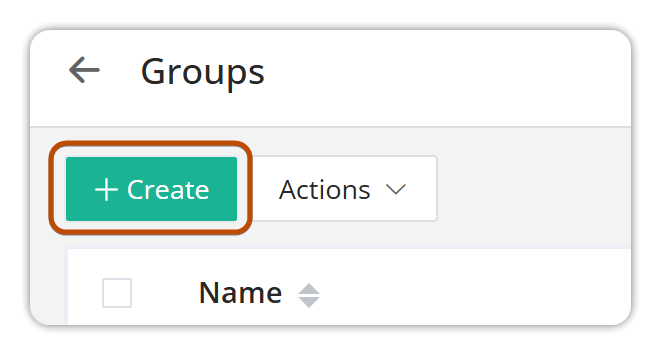
Create a group
- In JumpServer, navigate to Console > Groups and click the + Create button.
- In the Name field, enter the group name.
- Optionally, in the Users field, select existing users.
- Optionally, in the Description field, enter a description of the group.
- Click Submit to create the group, or Save & Continue to create and add more.