Manage users
This topic describes how to manage users.
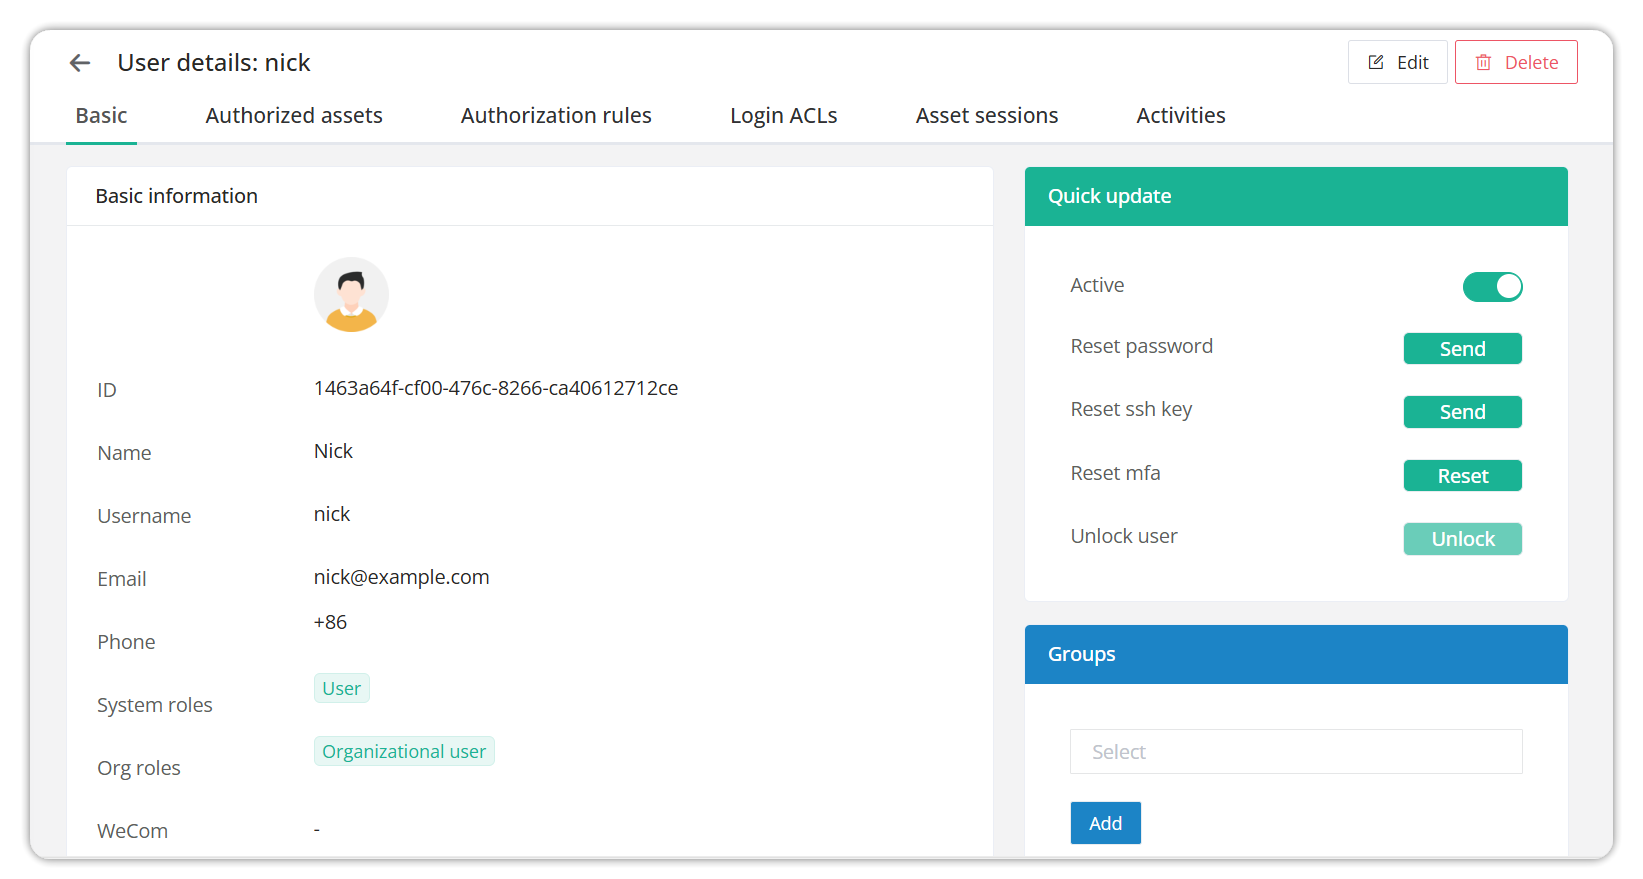
View user details
- In JumpServer, navigate to Console > Users.
- In the Users list, locate the relevant user and click the user name to open the details page.
- On the
Basicpage (default), where you can viewBasic informationand more.
Edit user properties and information
- In JumpServer, navigate to Console > Users.
- In the Users list, locate the relevant user and click the Edit in the
Actionscolumn. Alternatively, in the top-right corner of the user details page, click Edit. - Change the properties or information that you want, and then click Submit.
Delete a user
- In JumpServer, navigate to Console > Users.
- In the Users list, locate the relevant user and select the ··· dropdown menu in the
Actionscolumn, then click Delete. Alternatively, in the top-right corner of the user details page, click Delete. - Confirm the information to be deleted in the popup, and then click OK.
Remove a user from current organization
- In JumpServer, navigate to Console > Users.
- In the Users list, locate the relevant user and select the ··· dropdown menu in the Actions column, then click Remove.
- Confirm the information to be removed in the popup, and then click OK.
- You can find the user you removed in global organization.
Duplicate a user
- In JumpServer, navigate to Console > Users.
- In the Users list, locate the relevant user and select the ··· dropdown menu in the Actions column, then click Duplicate.
- Modify the user properties and information, and then click Submit.
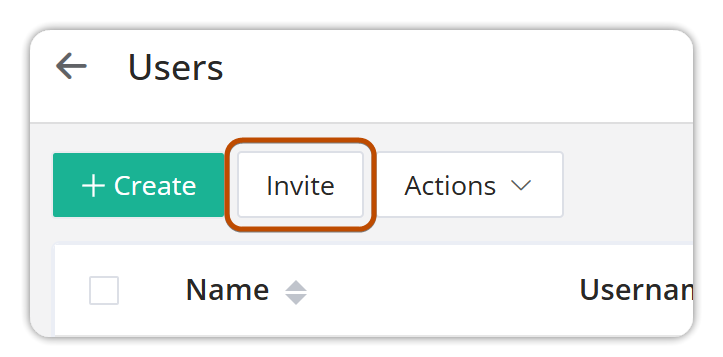
Invite users
- In JumpServer, navigate to Console > Users, then click Invite above the Users list.
- Select the relevant users you want to invite and assign organizational roles to the users to set their permission level in this organization.
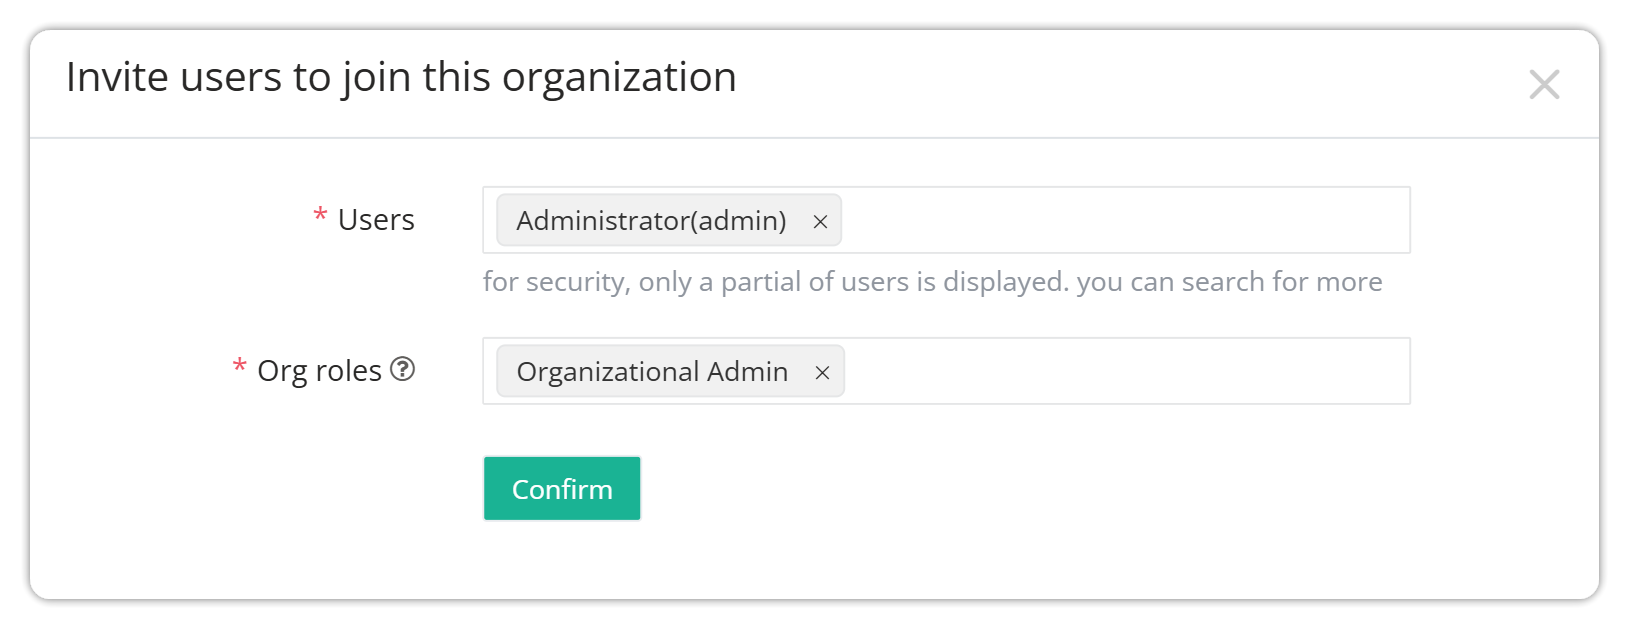
- Click Confirm to invite the users.
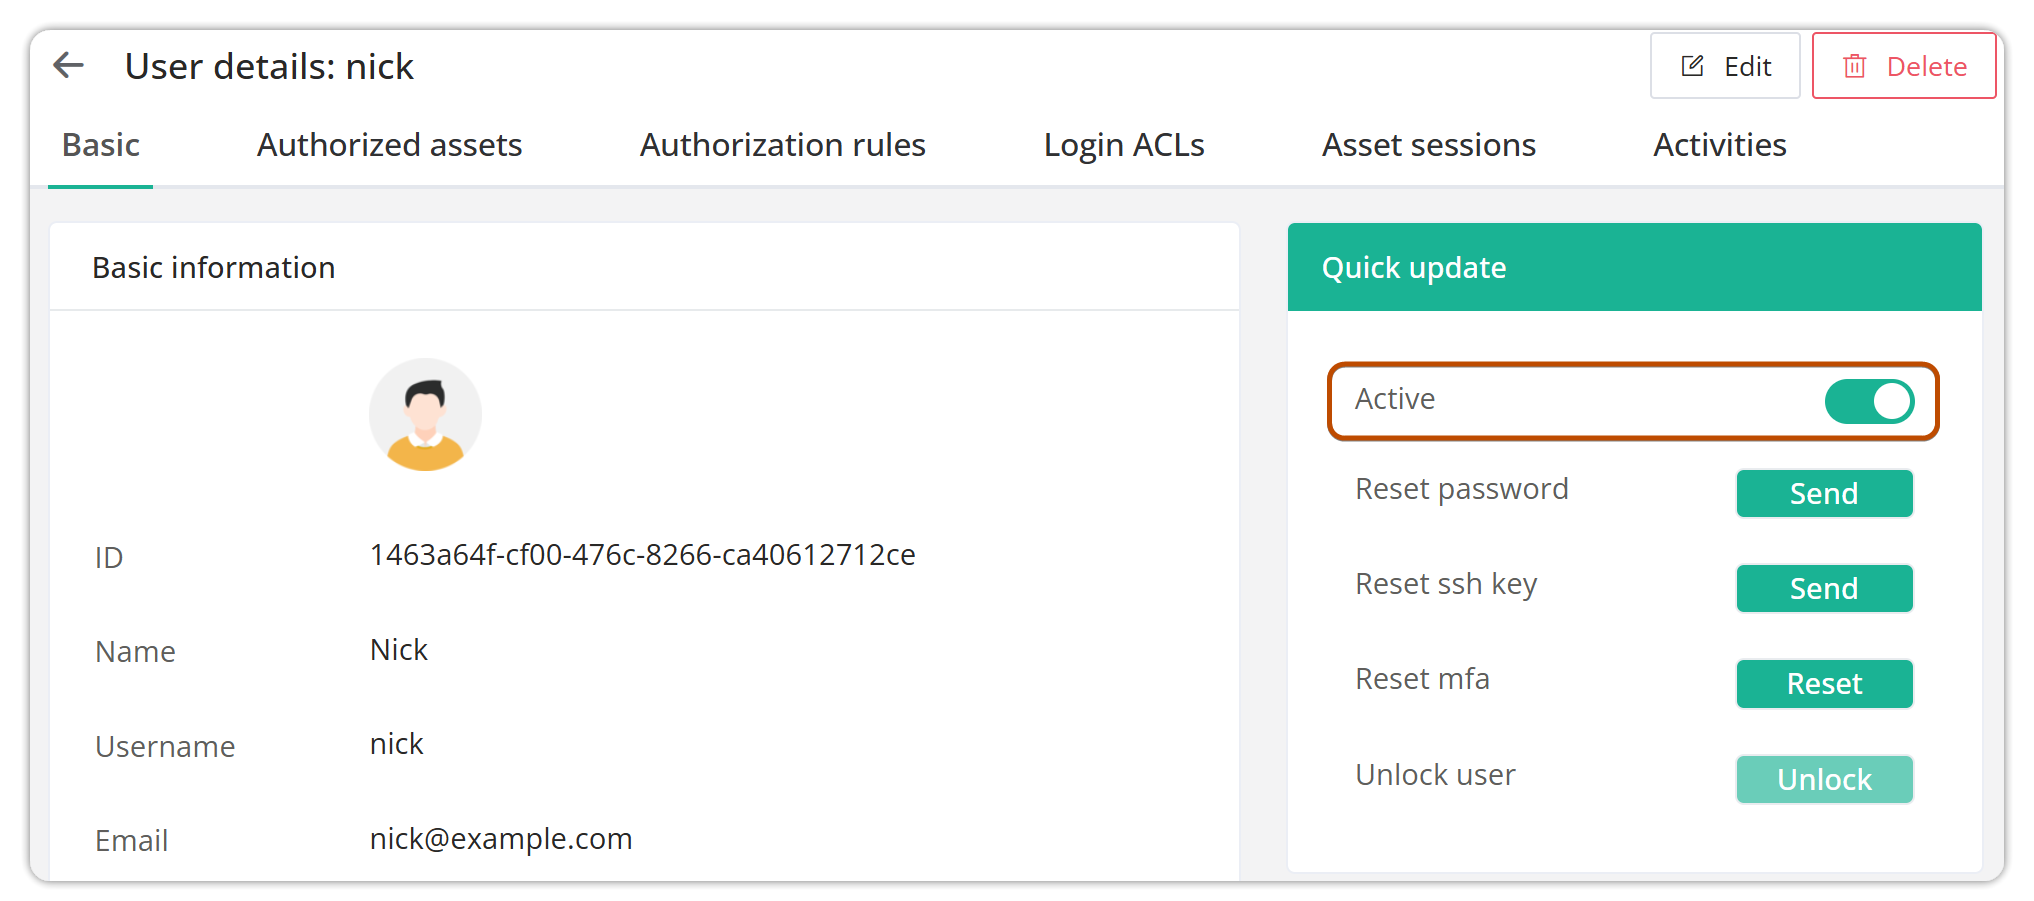
Enable or disable a user
-
In JumpServer, navigate to Console > Users.
-
In the Users list, locate the relevant user and click the user name to open the details page.
-
On the
Basicpage (default), locate theQuick updatecard on the right, then click Active switch to enable or disable the user.
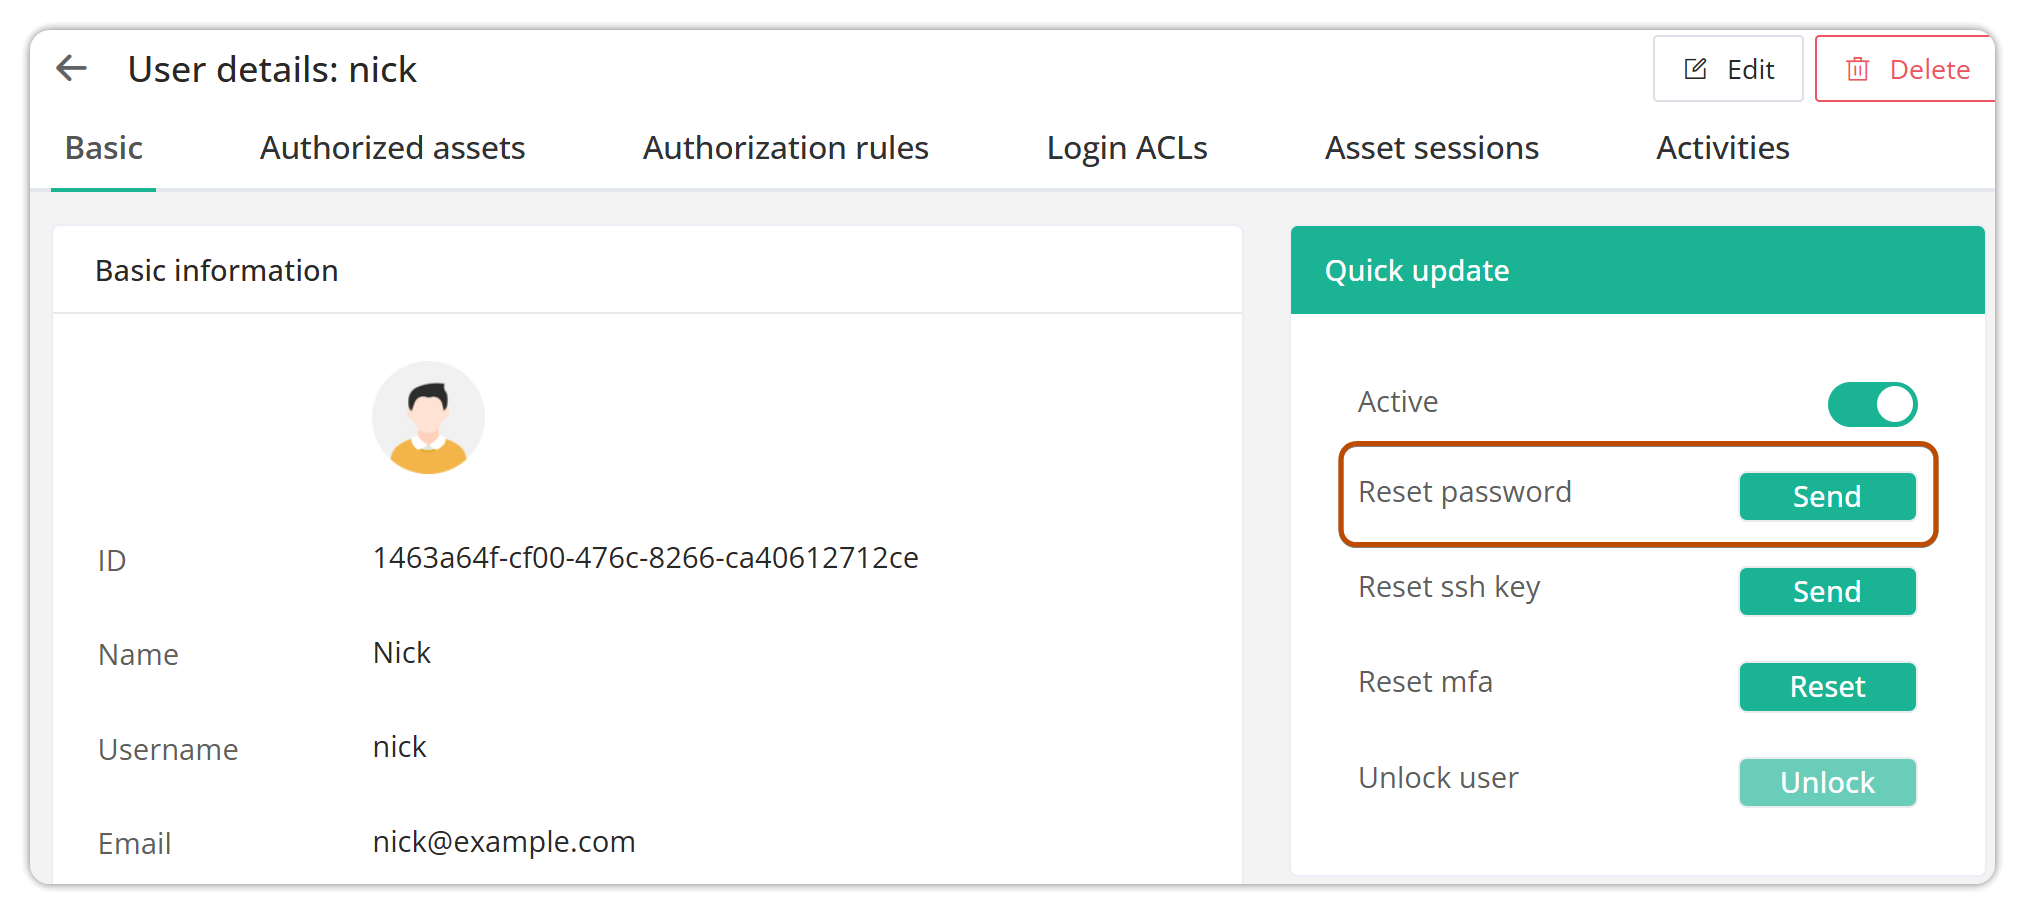
Reset password
-
In JumpServer, navigate to Console > Users.
-
In the Users list, locate the relevant user and click the user name to open the details page.
-
On the
Basicpage (default), locate theQuick updatecard on the right and click Send button on the right side of Reset password. A password reset email will be sent to this user.
Reset ssh key
-
In JumpServer, navigate to Console > Users.
-
In the Users list, locate the relevant user and click the user name to open the details page.
-
On the
Basicpage (default), locate theQuick updatecard on the right and click Send button on the right side of Reset ssh key.

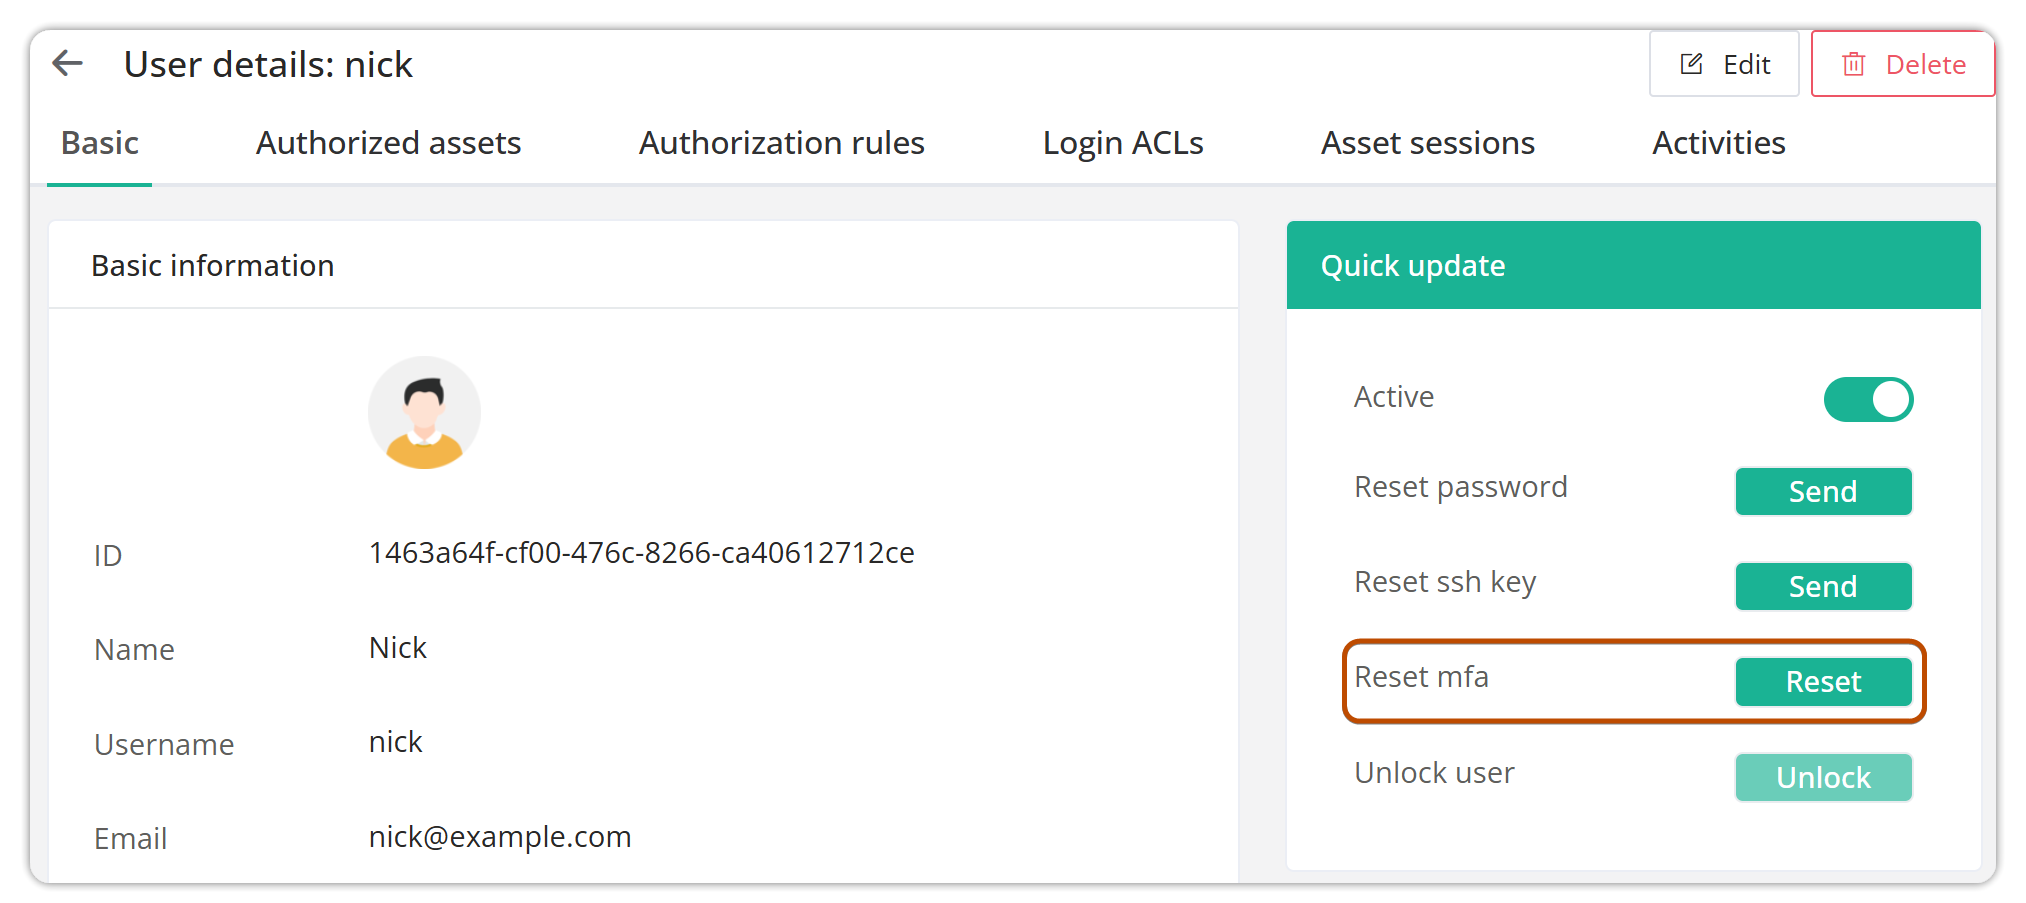
Reset MFA
-
In JumpServer, navigate to Console > Users.
-
In the Users list, locate the relevant user and click the user name to open the details page.
-
On the
Basicpage (default), locate theQuick updatecard on the right and click Reset button on the right side of Reset MFA.
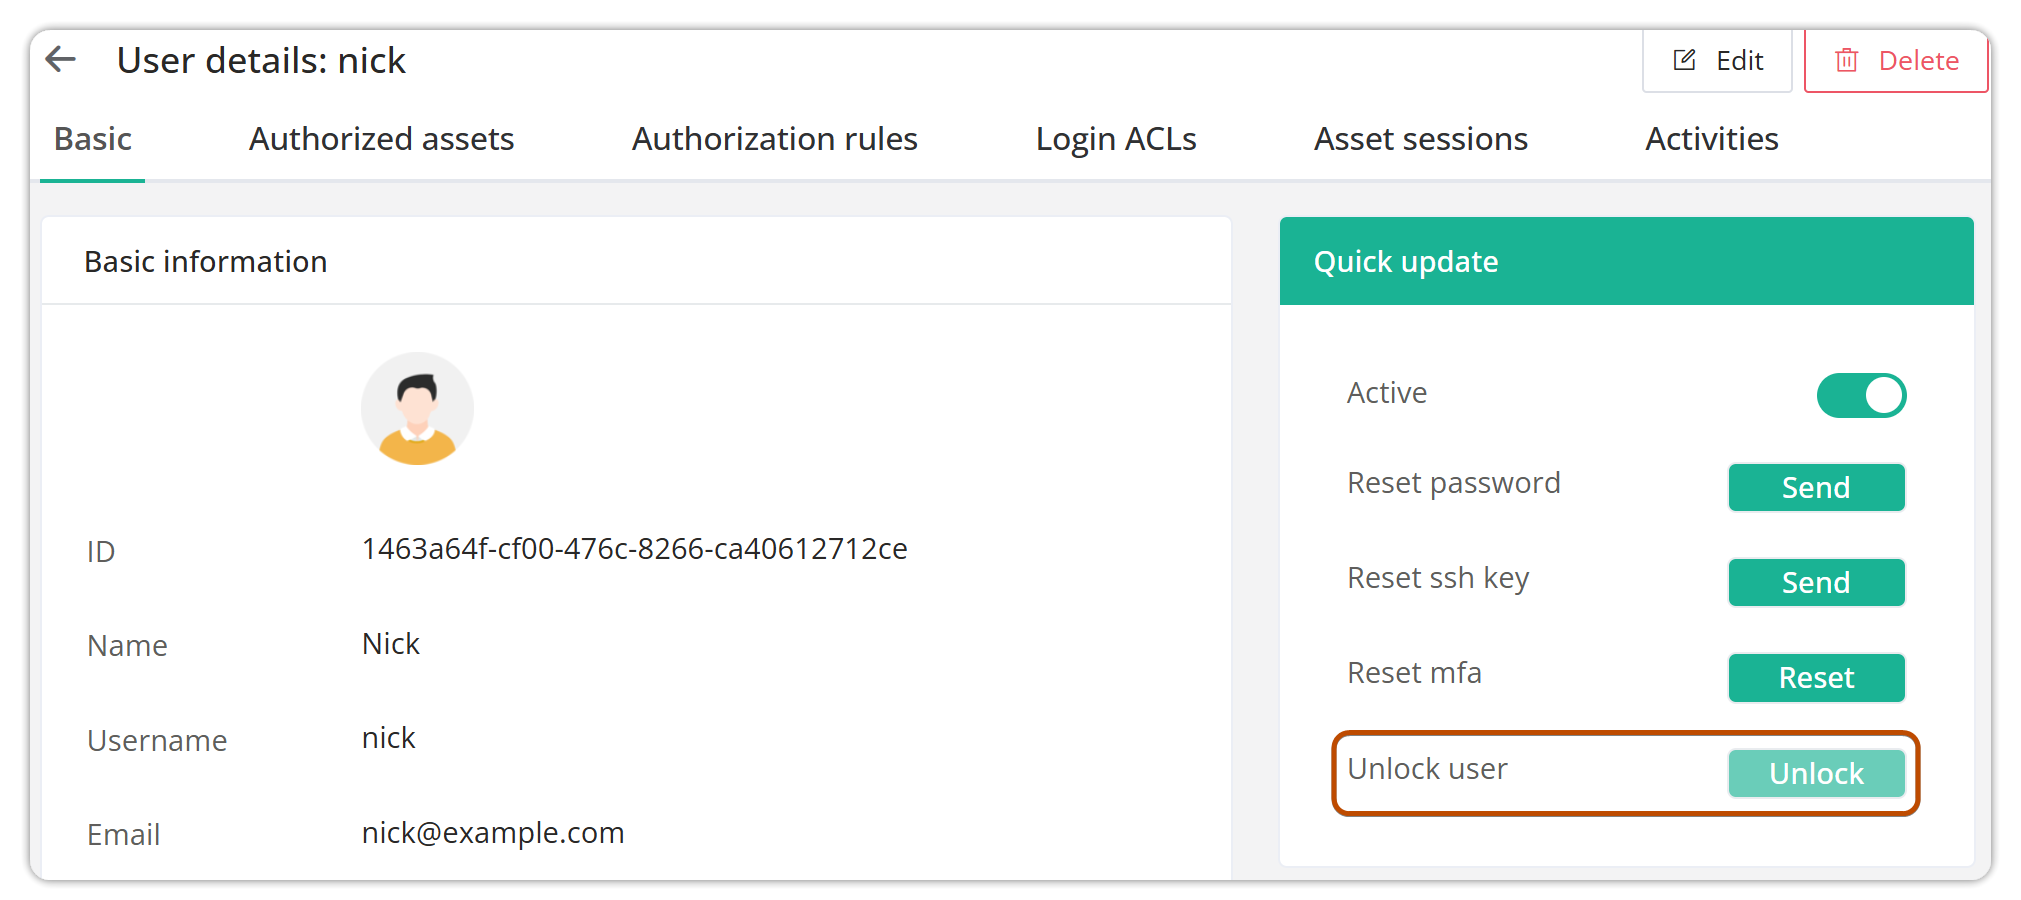
Unlock user
-
In JumpServer, navigate to Console > Users.
-
In the Users list, locate the relevant user and click the user name to open the details page.
-
On the
Basicpage (default), locate theQuick updatecard on the right and click Unlock button on the right side of Unlock User.
Add or remove groups for a user
-
In JumpServer, navigate to Console > Users.
-
In the Users list, locate the relevant user and click the user name to open the details page.
-
On the
Basicpage (default), locate theGroupscard on the right. -
Select one or more groups, and you can search by group name, then click Add.
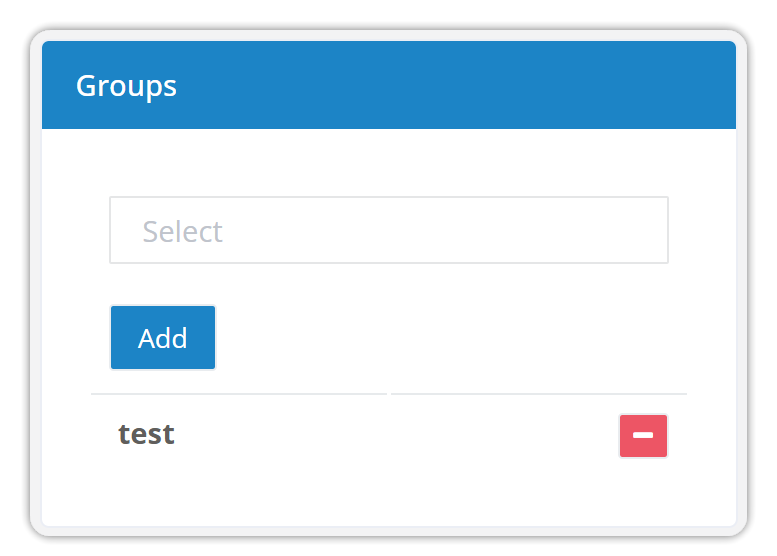
- Click - icon to Remove the group.
View user authorized assets
-
In JumpServer, navigate to Console > Users.
-
In the Users list, locate the relevant user and click the user name to open the details page.
-
On the
Authorized assetspage, you can view authorized assets of the user.
View user authorization rules
-
In JumpServer, navigate to Console > Users.
-
In the Users list, locate the relevant user and click the user name to open the details page.
-
On the
Authorization rulespage, you can view authorization rules of the user.
View user login ACLs
-
In JumpServer, navigate to Console > Users.
-
In the Users list, locate the relevant user and click the user name to open the details page.
-
On the
Login ACLspage, you can view login ACLs rules of the user.
View user asset sessions
-
In JumpServer, navigate to Console > Users.
-
In the Users list, locate the relevant user and click the user name to open the details page.
-
On the
Asset sessionspage, you can view asset sessions of the user.
View user activities
-
In JumpServer, navigate to Console > Users.
-
In the Users list, locate the relevant user and click the user name to open the details page.
-
On the
Activitiespage, you can view the last 30 activity logs of the user, including user updates, logins, operations and more.